Quickstart tutorial#
This quickstart follows an example explaining how to build data science pipelines in Orchest and touches upon some core principles that will be helpful when you get to building your own pipelines. The example Pipeline will download the sklearn California housing dataset, explore the data, train some classifiers, and in the final step collect the results from those classifiers.
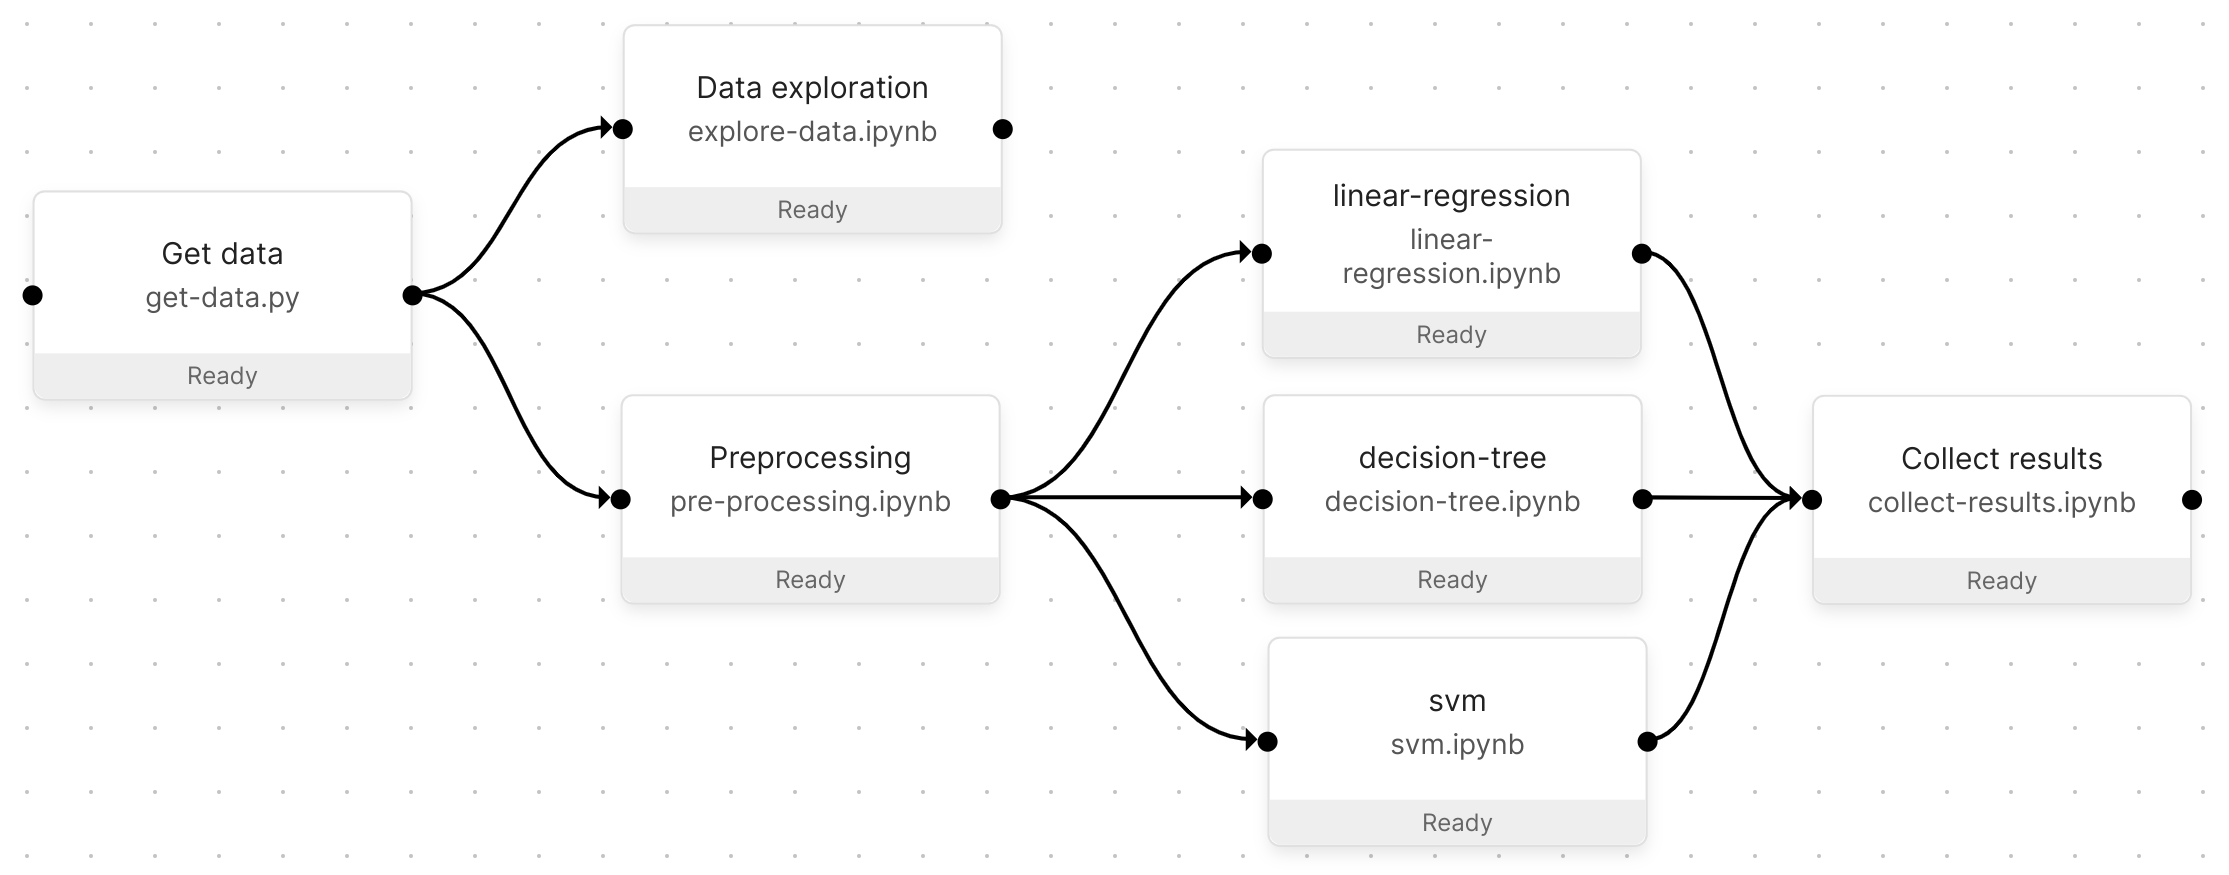
The resulting Pipeline from this quickstart.#
Tip
👉 Building data pipelines in Orchest is easy! Check out our introductory video.
For the impatient#
As Miguel Grinberg would say: “If you are the instant gratification type, and the screenshot at the top of this article intrigued you, then head over to the Github repository for the code used in this article. Then come back to learn how everything works!”
To get started in Orchest you can import the “Quickstart Pipeline” example Project through the UI:

Create your first Project in Orchest#
To start, make sure you have installed Orchest or go to your Orchest
Cloud account. Next, create a new Project named
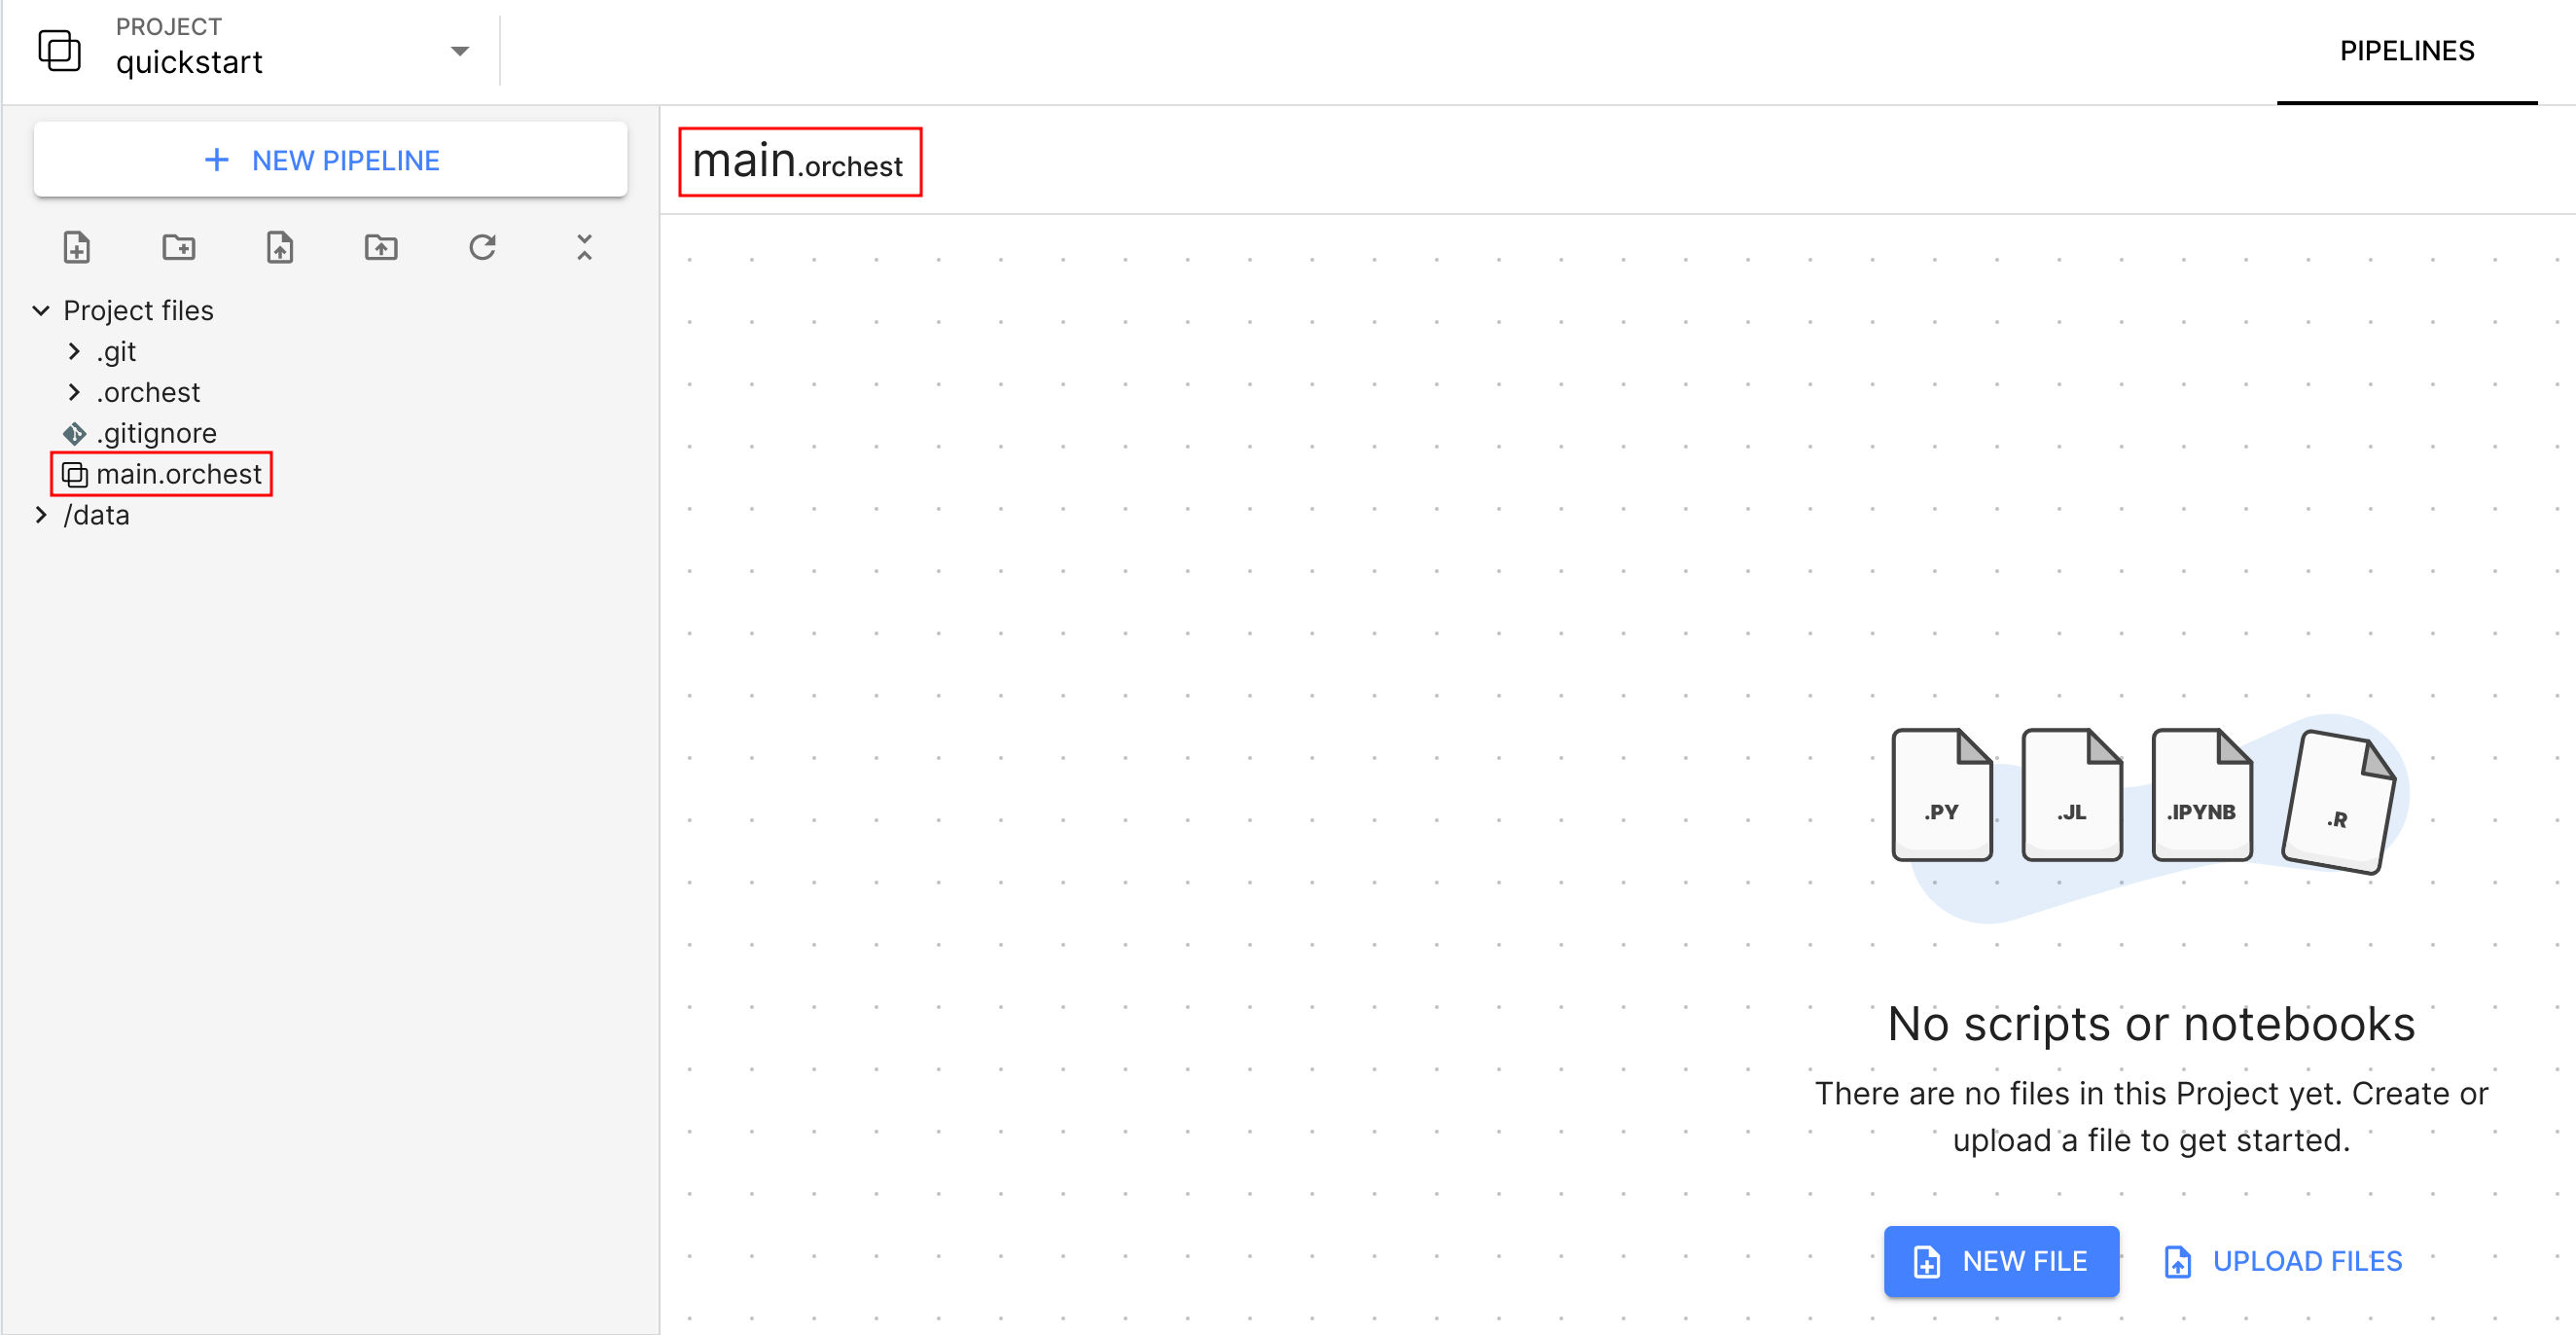
quickstart. After creating the Project, you will automatically be taken to the Pipeline editor.
Note that Orchest has created an empty default Pipeline for you,
called main.orchest.
Note
All code in this quickstart is written in Python, nevertheless, Orchest also supports other languages such as R.
Get California housing data#
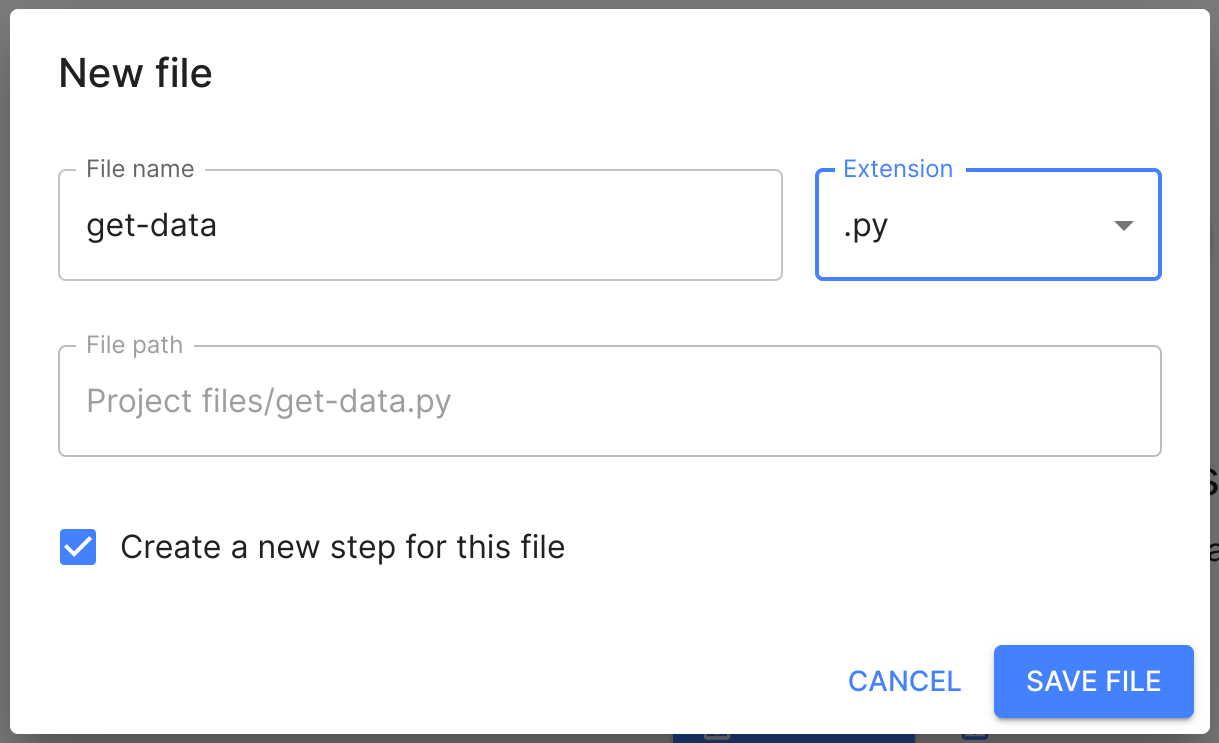
After creating the Project, it is still empty. Let’s create a new file to start building your
Pipeline. Name your file get-data and choose the .py extension. Make sure to check the
Create a new step for this file box to automatically create a Step for the file:
Note
The changes you make to the Pipeline (through the Pipeline editor) are saved automatically.
Now you can start writing some code through the familiar JupyterLab interface, simply press edit in JupyterLab and paste in the following code:
 1import orchest
 2import pandas as pd
 3from sklearn import datasets
 4
 5# Explicitly cache the data in the "/data" directory since the
 6# kernel is running in a container, which are stateless.
 7# The "/data" directory is a special directory managed by Orchest
 8# to allow data to be persisted and shared across pipelines and
 9# even projects.
10print("Dowloading California housing data...")
11data = datasets.fetch_california_housing(data_home="/data")
12
13# Convert the data into a DataFrame.
14df_data = pd.DataFrame(data["data"], columns=data["feature_names"])
15df_target = pd.DataFrame(data["target"], columns=["MedHouseVal"])
16
17# Output the housing data so the next steps can retrieve it.
18print("Outputting converted housing data...")
19orchest.output((df_data, df_target), name="data")
20print("Success!")
A few lines in the code above are highlighted to emphasize important nuts and bolts to get a better understanding of building pipelines in Orchest. These nuts and bolts are explained below:
Line
2and3import third-party packages that need to be installed in the Environment. Environments define the execution environment in which your scripts are executed. To installpandasandsklearnsimply head over to the Environments tab, addpip install pandas sklearnto the setup script and press Build. That is all it takes to build a container under the hood in which your script will be executed!Line
11caches the data in the/datadirectory. This is actually theuserdir/datadirectory (from the Orchest GitHub repository) that gets mounted in the respective container running your code. This allows you to access the data from any pipeline, even from pipelines in different projects. Data should be stored in/datanot only for sharing purposes, but also to make sure that jobs do not unnecessarily copy the data when creating the snapshot for reproducibility reasons.Lastly, line
19showcases the usage of the Orchest SDK to pass data between pipeline steps. Keep in mind that callingorchest.transfer.output()multiple times will result in the data getting overwritten, in other words: only output data once per step!
To run the code, switch back to the Pipeline editor and press run all. After just a few seconds
you should see that the Step completed successfully. Select the Step and check the logs to confirm -
they contain the latest STDOUT of the get-data.py script.
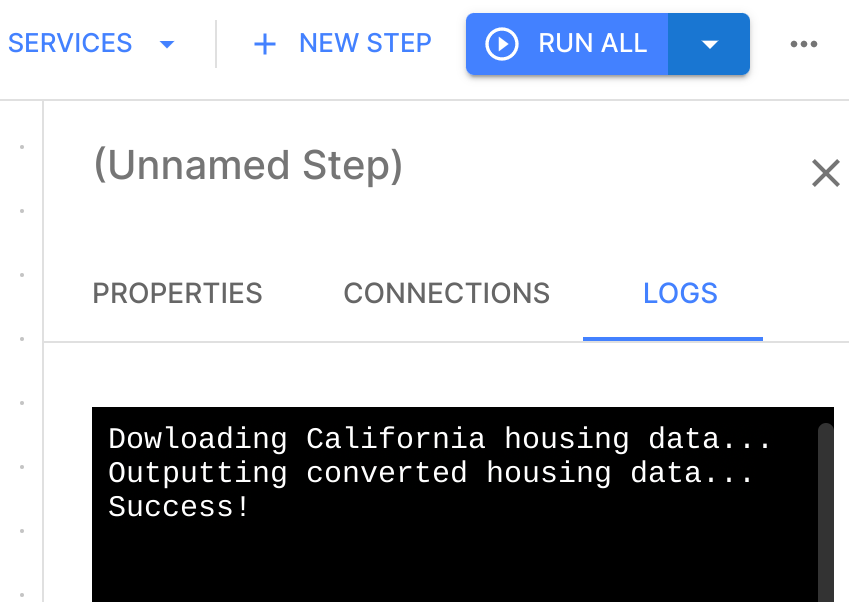
Remember that running the code will output the converted housing data, so in the next Step you can now retrieve and explore that data!
Data exploration#
Now that you have downloaded the data, the next Pipeline Step can explore it. Create another file
called explore-data.ipynb (again make sure to check the box to automatically create a Step for
it), and connect the two Pipeline Steps.

You can get the code for this Pipeline Step from the explore-data.ipynb file in the GitHub
repository by copy-pasting the
code, or using the upload file functionality from the built-in file-manager:

Finalizing the pipeline#
To end up with the final Pipeline, please refer to the For the impatient section to import the Pipeline. You can also build the Pipeline from scratch yourself!
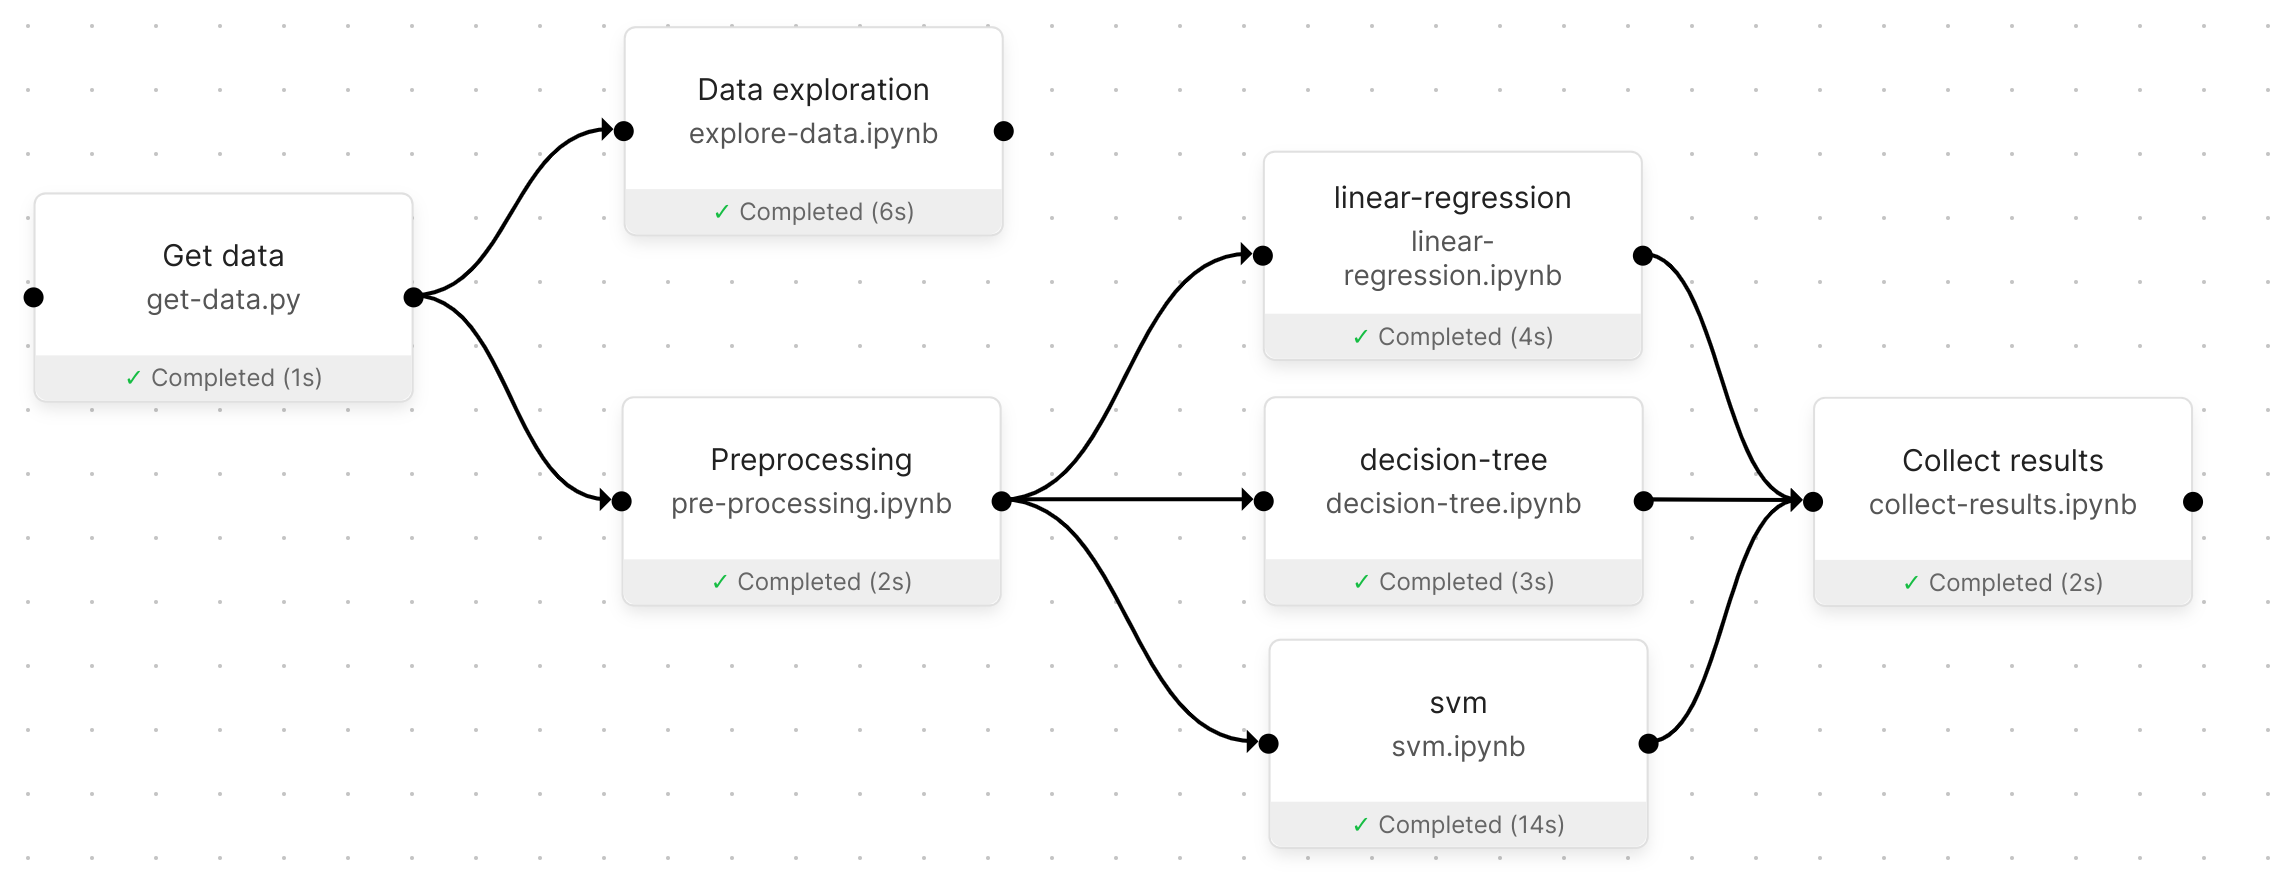
A successful Pipeline run of the final Pipeline.#
Note
The interactive session does not shut down automatically and thus the resources will keep running when editing another Pipeline, you can shut down the session manually by clicking the toggle button in the Pipeline sessions section in the Pipeline editor.